Thursday, May 7, 2020

Final Project

Table-Top Organ Modification


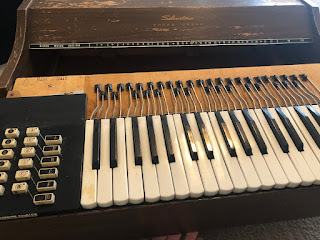
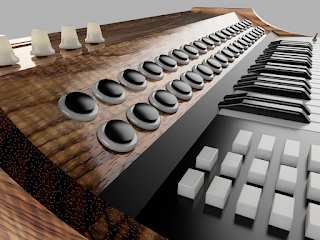
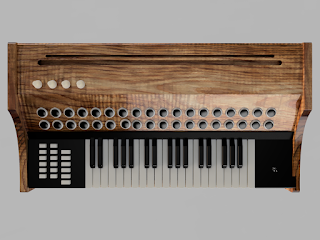
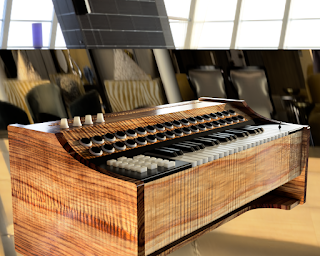
The “Do-It Yourself” (DIY) approach to problem solving can be very rewarding. I utilized the concepts I learned in the FMX 213 course at the University of Tamps to generate realistic looking renderings for a modified Table-top Organ. The organ was purchased at a thrift store in New Orleans nearly a decade ago. It has a very retro look, being that it was made around the 1950’s in Italy; but labeled and sold by Sears & Roebuck. When it worked, it never really sounded great, so I didn’t feel bad about modifying it as a MIDI controller. I don’t have a specific functionality for it, but I’d like to use it as a performance controller and sample triggering device. To make this a reality, I would use a raspberry pi with a top hat from adafruit to connect potentiometers and arcade style buttons. This project allowed me an opportunity to not only use the skills I’ve learned in the class, but to design a useful MIDI controller for use in future projects. I also want to mention that I did not design the arcade buttons or the potentiometers and caps for them. However, I did create the rest of the instrument including the push buttons on the left of the keyboard, the body of the organ, and all the keys.

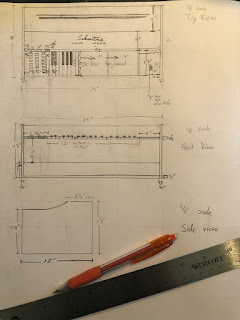
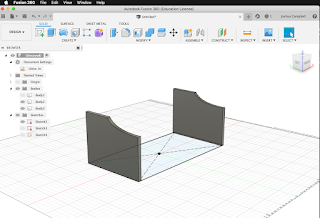
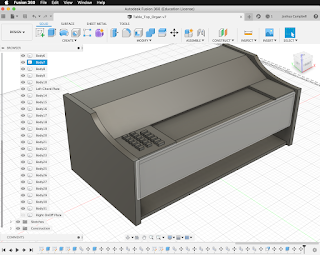
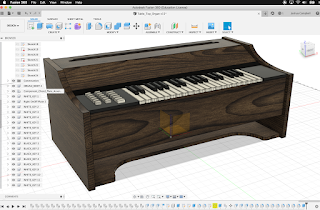
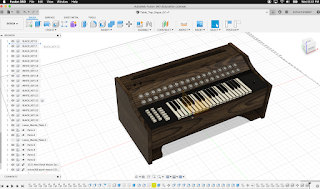
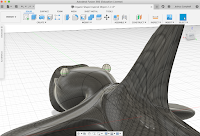
After the initial concept came to me, I started sketching 3 views in my sketchbook, and recording important measurements. In Fusion 360, I started my design in sketch-view. I worked on the body first, then on the two black panels located at the ends of the keys. The push buttons were fairly straight forward as well. I extruded them from a sketch and used them to cut away from the black panel. While the model doesn’t include all of the inner working parts, it’s a very good representation of the instrument, and what the final project will look like upon completion.


Process Documentation Images:
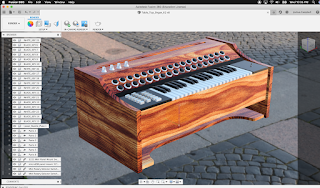
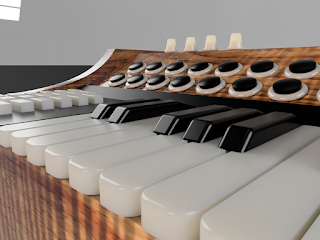


FINAL RENDERS:


Friday, April 17, 2020

Project 3
Organic Inspired Object

Buck-Tooth Tuna

aka 

Fish-Tard


Title: Buck-Tooth Tuna aka Fish-Tard

Course: FMX 213 - 3D Printing and Design

Term: Spring 2020

Professor: Mikhail Mansion

Equipment: MacBookPro, Autodesk Fusion 360 modeling software

Description: I find myself longing for the peaceful walks in Hawaii along Kailua Beach. Unlike other beaches, it was common to see kite-surfers, paddle boarders, kayakers, boogie boarders, snorkelers, sun bathers, and fisherman. One night while walking the beach, some local fisherman caught a baby hammerhead shark, which was the initial inspiration for my design. The other prominent influence comes from my recent interest in cartoon animation history, and a reflection of my past work. My idea was to start with a similar shape of the hammer-head, and modify it until it was much less intimidating, and quite cartoonish. As this was a baby hammer-head, I found it considerably less threatening than a full grown adult. The texture of sharks is also known to be quite course, like sandpaper. This baby shark had a smoother texture, perhaps closer to an 800 grit sand paper. I felt that the carbon fiber look held true to the essence of being smooth, yet still having a perceivable texture when touched. The teeth were obviously meant to be playful, as were the eyes. Overall, I'm happy with the results of my first organic shaped 3D project. If I were to do it again, I'd want to add eyelids, long eyelashes, and gills. I think I would also try rendering a few different poses to give off a better idea of the character and moment of my buck-tooth tuna.


Hammer-Head Shark, Kailua, HI (photo by Joshua J. Campbell, 2018)


WORK IN PROGRESS 
(DESIGN VIEW)


RENDERING VIEW


ADDITIONAL RENDERINGS


Tuesday, March 31, 2020

Exercise 3, Organic Shapes

SEA SHELL

Prompt: 

"Shells come from sea creatures and grow into a wide variety of unique organic shapes. Start by finding a set of references images of a seashell, or take the pics yourself."

"In this exercise you should use the image canvas feature in Fuesion 360 in order to create a reference to the side and top of the shell. When sourcing your reference image, it's important to have a clear view of both top and side of the object."

FINAL RENDERS


PROCESS PHOTOS:


Thursday, March 5, 2020

Project II: 3D object in a movie

Project II

MEDALLION DE AZTECA BLANCO

aka

LEBOWSKI'S JESUS MEDALLION

The Untold Story of
"THE JESUS"

You are probably familiar with the story of "The Dude" from the Coen Brothers classic movie, The Big Lebowski The Coen's however failed to reveal the until now, unsubstantiated tales of "The Jesus". His power comes from the ancient "Medallion De Azteca Blanco", which hasn't been seen since the almost forgotten collapse of the St. Francis Dam on March 12, 1928. Intent on saving Los Angeles from Nihilist occupation and the porn industry, the Jesus attempts to awaken the ancient power of the medallion.


"Where there is great power there is great responsibility"

- Winston ChurchillMedallion De Azteca Blanco

The Untold Story of

"THE JESUS"

You are probably familiar with the story of "The Dude" from the Coen Brothers classic movie, The Big Lebowski.  The Coen's however failed to reveal the until now, unsubstantiated tales of "The Jesus". His power comes from the ancient "Medallion De Azteca Blanco", which hasn't been seen since the almost forgotten collapse of the St. Francis Dam on March 12, 1928. Intent on saving Los Angeles from Nihilist occupation and the porn industry, the Jesus attempts to awaken the ancient power of the medallion.

THREE FRAMES 
from the Bowling Scene...


FRAME I: 
A secret society


Left - 3D model
Right - Original image
Bottom - New Image


FRAME II: 
The Invocation


FRAME III: 
Activating the Medallion's Power


Project Guidelines:

Option 2

Select a favorite film. Create an object that was not part of the original film. Taking 3 frames from the original footage, place your object into each scene. Develop a new narrative that explains the object’s relevance in the scene.