Table-Top Organ Modification
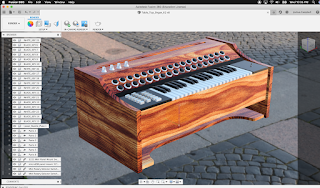
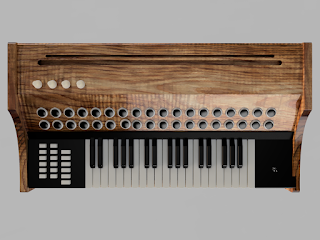
The “Do-It Yourself” (DIY) approach to problem solving can be very rewarding. I utilized the concepts I learned in the FMX 213 course at the University of Tamps to generate realistic looking renderings for a modified Table-top Organ. The organ was purchased at a thrift store in New Orleans nearly a decade ago. It has a very retro look, being that it was made around the 1950’s in Italy; but labeled and sold by Sears & Roebuck. When it worked, it never really sounded great, so I didn’t feel bad about modifying it as a MIDI controller. I don’t have a specific functionality for it, but I’d like to use it as a performance controller and sample triggering device. To make this a reality, I would use a raspberry pi with a top hat from adafruit to connect potentiometers and arcade style buttons. This project allowed me an opportunity to not only use the skills I’ve learned in the class, but to design a useful MIDI controller for use in future projects. I also want to mention that I did not design the arcade buttons or the potentiometers and caps for them. However, I did create the rest of the instrument including the push buttons on the left of the keyboard, the body of the organ, and all the keys.
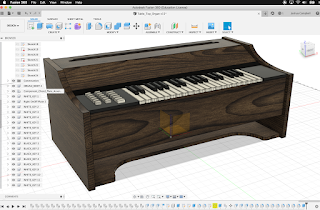
After the initial concept came to me, I started sketching 3 views in my sketchbook, and recording important measurements. In Fusion 360, I started my design in sketch-view. I worked on the body first, then on the two black panels located at the ends of the keys. The push buttons were fairly straight forward as well. I extruded them from a sketch and used them to cut away from the black panel. While the model doesn’t include all of the inner working parts, it’s a very good representation of the instrument, and what the final project will look like upon completion.
Process Documentation Images:


FINAL RENDERS:


Process Documentation Images:


FINAL RENDERS:


